2017年5月15日 星期一

[GitLab] 如何產生 SSH KEY與進行綁定

首先你要先裝好GIT,以下兩個網站都可以下載GIT安裝

1.      打開git command line介面輸入
ssh-keygen -t rsa -C "your.email@example.com" -b 4096
C為註解,隨便打都行。
2.      Windows存放金鑰的地方在您的User資料夾下的.ssh資料夾裡,此時可透過Git Lab Settings設定您的ssh key,請貼上id_rsa.pub裡面的字串給Git Lab

3.      然後您就可以使用SSH方式存取您的專案了,不用每次PUSH都需要再打密碼。

2017年5月7日 星期日

[Tool] pixel text

http://pixelartmaker.com

[免費軟體] S3 browser

來跟大家介紹一個好用的S3連線軟體S3 browser
官方網站: http://s3browser.com

1.      hicloud S3為例,中華電信S3 Servers3.hicloud.net.tw,輸入access keysecret進行連線。
2.      您可以進行創建您想要的bucket,其連線方式為https://{您的bucket name}.s3.hicloud.net.tw/{File Name}
如果有資料夾的話為
https://{您的bucket name}.s3.hicloud.net.tw/{Folder Name}/{File Name}
3.      記得您的權限設定,權限設定為對bucket點右鍵,有一個edit bucket policy,請輸入以下JSON,為公開您的Bucket設定。
{
  "Statement": [
    {
      "Effect": "Allow",
      "Principal": {
        "AWS": "*"
      },
      "Action": [
        "s3:PutObject",
        "s3:GetObject",
        "s3:PutObjectAcl"
      ],
      "Resource": "arn:aws:s3:::{你的Bucket Name}/*",
      "Condition": {
        "IpAddress": {
          "aws:SourceIp": "0.0.0.0/0"
        }
      }
    }
  ]
} 
4.      設定CORS
<?xml version="1.0" encoding="UTF-8" standalone="yes"?>
<CORSConfiguration xmlns="http://s3.amazonaws.com/doc/2006-03-01/">
  <CORSRule>
    <AllowedMethod>GET</AllowedMethod>
    <AllowedMethod>PUT</AllowedMethod>
    <AllowedMethod>POST</AllowedMethod>
    <AllowedMethod>DELETE</AllowedMethod>
    <AllowedOrigin>*</AllowedOrigin>
    <AllowedHeader>*</AllowedHeader>
  </CORSRule>
</CORSConfiguration>

[Android] Google Mob廣告教學

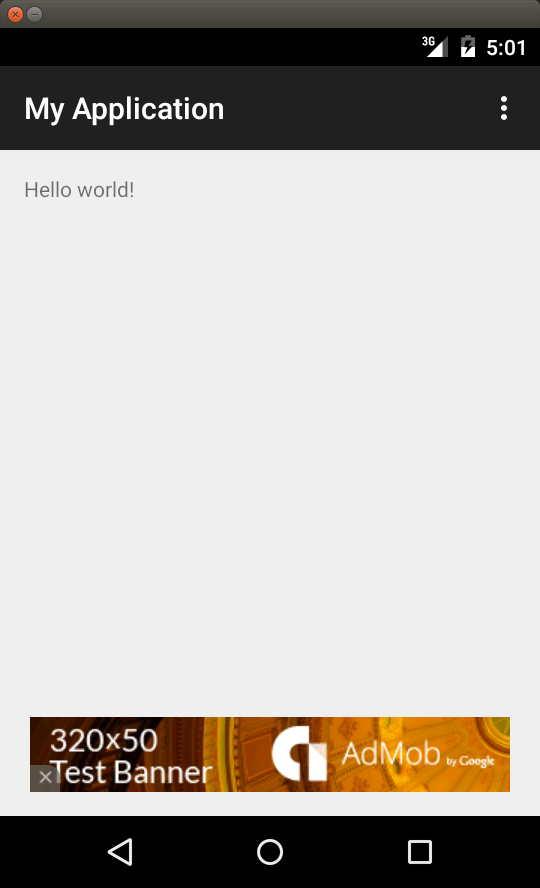
Android使用Google Mob廣告教學

1.      build.gradle內的dependencies加入
...
dependencies {
    compile fileTree(dir:
'libs', include: ['*.jar'])
    compile
'com.android.support:appcompat-v7:xx.x.x'
    compile 'com.google.android.gms:play-services-ads:10.2.4'

}
...

2.      strings.xml內加入您的廣告單元編號
<?xml version="1.0" encoding="utf-8"?>

<resources>
    <string name="app_name">My Application</string>
    <string name="hello_world">Hello world!</string>
    <string name="action_settings">Settings</string>
    <string name="banner_ad_unit_id">ca-app-pub-3940256099942544/6300978111</string>
</resources>

3.      在逾放廣告的最外層Layout加入
<RelativeLayout xmlns:android="http://schemas.android.com/apk/res/android"
       
xmlns:tools="http://schemas.android.com/tools"
       
xmlns:ads="http://schemas.android.com/apk/res-auto"
       
...
       
       
<TextView android:text="@string/hello_world"
           
android:layout_width="wrap_content"
           
android:layout_height="wrap_content" />
       
       
<com.google.android.gms.ads.AdView
           
android:id="@+id/adView"
           
android:layout_width="wrap_content"
           
android:layout_height="wrap_content"
           
android:layout_centerHorizontal="true"
           
android:layout_alignParentBottom="true"
           
ads:adSize="BANNER"
           
ads:adUnitId="@string/banner_ad_unit_id">
       
</com.google.android.gms.ads.AdView>
</RelativeLayout>

4.      Activity onCreate初始化您的廣告
MobileAds.initialize(getApplicationContext(), "ca-app-pub-3940256099942544~3347511713");//改成您的應用程式編號

AdView mAdView = (AdView) findViewById(R.id.adView);
AdRequest adRequest = new AdRequest.Builder().build();
mAdView.loadAd(adRequest);


[Linux] 用iptables封鎖ip

iptables封鎖ip

1. 封鎖整個IP,會DROP所有此IP的連線
sudo iptables -A INPUT -s IP_ADDRESS -j DROP

2. 查看iptables清單
sudo iptables –L
sudo iptables –S


[CentOS] httpd port 9000 to 80

<VirtualHost *:80>     ServerName domain.name     ProxyRequests Off     ProxyVia Block     ProxyPreserveHost On     <Proxy *...